
DIY e-liquid is vape juice that a vaper makes at home with just a few ingredients and a small amount of equipment. With DIY eliquids, you can experiment with flavour combinations and VG/PG mix ratios to find a vape juice that suits you personally.
Disclaimer: Anyone considering DIY mixing in the UK should also note that the government’s Vaping Products Duty (VPD), which took effect from 1 October 2026, applies a £2.20 charge per 10ml to vape liquids and DIY ingredients alike. According to HMRC, home-mixing liquids that haven’t already had the duty paid is against the law under VPD, regardless of whether it’s for personal use. That said, there’s no issue with blending a shortfill and nic shot that have both already been taxed. Our breakdown of the UK Vape Tax 2026 (VPD) explains what this means in practice.
What Are DIY E-liquids?
DIY e-liquid is homemade vape juice. While making your own vape juice may sound complicated, it’s a straightforward and fun process for any vaper.
Just like a ready-to-vape e-liquid, a homemade vape juice consists of a VG/PG base mix, flavour concentrates and nic shots. A handful of bottles, beakers, and pipettes are all the gear you’ll need to open your own DIY vape juice production area.
What Are the Benefits of DIY E-liquids?
There are numerous benefits to DIY vape juice, such as being able to control the flavour, thickness and nicotine strength of your batch.
1. Curiosity
Sometimes, it can take a while to find an e-liquid that suits you, and making your own vape juice allows you to mix and blend various intense flavour varieties to see what matches your preferred palette of tastes. It also lets you try unorthodox combinations; most manufacturers won’t risk mixing menthol with butterscotch, but that might be a blend you adore!
2. Control
When you make your own e-liquid, you’re in total control over the flavour, the thickness of the final e-liquid batch and the nicotine strength. There’s no need to settle for what a manufacturer thinks is best when you’re the one measuring out the VG/PG and adding the nic shots.
The Tobacco Products Directive prevents UK retailers from selling e-liquid stronger than 20mg, but nothing is preventing you from cranking up the nicotine volume if 20mg isn’t satisfying to you.
3. Ingredients, Your Way
When you buy pre-mixed e-liquids, you’re paying for the finished product exactly as the manufacturer intended it. Mixing your own means sourcing PG/VG, flavour concentrates, and flavourless nic shots individually and blending them to your own specification — a hands-on approach for vapers who value customisation and don’t mind the extra time it takes.
What Do You Need for DIY E-Liquid?
To produce DIY e-liquid, you only need four things:
- Nicotine shots (optional!)
- Flavour concentrates
- PG & VG
- DIY vaping accessories
We’ll now go over these and how they’re used in greater detail.
Nic Shots (Optional)
Nic shots are 10ml bottles of nicotine solution in the form of a flavourless PG/VG suspension. Nic shots are classed as e-liquid and, as such, must abide by TPD restrictions on size and strength, so they’ll never be more potent than 18mg or 20mg. You’re free to use as many as you like, however!
Nicotine shots are, of course, optional, as you may be vaping for flavour and cloud production alone.
Flavour Concentrates
Flavour concentrates are liquids that carry powerful flavourings you’ll be diluting into a VG/PG base mix. The tastes themselves are often food-grade, but with VG/PG added to help them emulsify into the greater DIY batch you’re making.
The best flavour concentrates often take their tastes from natural sources. You’ll often see tobacco flavourings called ‘essences,’ sourced from genuine tobacco leaf cuttings.
Our top three recommendations are:
If you’re cautious about getting too creative, check out our handy DIY eliquid flavour chart to see what pairings work well.
PG & VG
PG (propylene glycol) and VG (vegetable glycerine) are vital components in almost all e-liquids. So, what are the differences when looking at PG vs VG?
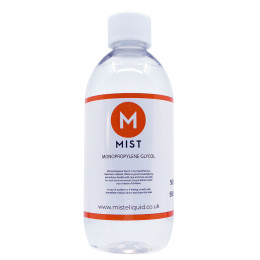
PG base liquid is a flavourless chemical used as a food additive derived from ethanol. PG has a similar viscosity to water and carries flavour very well. PG tends to impart a throat or chest ‘hit’ when inhaled.
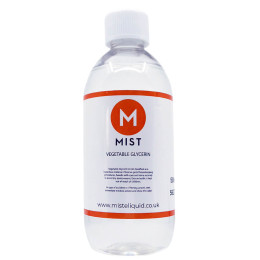
VG base liquid is a natural sugar solution extracted from fruits and vegetables, often used as a primary ingredient in many cough syrups. VG is very thick, and using it will often make vape liquid smoother to inhale. VG also makes big vape clouds, and it’s worth noting that a high-VG cloudy vape juice will only absorb into coils that are built with it in mind.
99% of e-liquids use a blend of these two ingredients as their base mix, to which flavours and nicotine will be added later. Some people do have a PG intolerance, which causes them painful irritation. Luckily, you can make 100% VG vape liquid, but remember, you’ll need a sub-ohm vape kit to use it efficiently.
DIY E-liquid Accessories
Once you have your base mixes, your flavourings and your optional nicotine shots, you’ll need a small number of mixing accessories in which to mix and bottle them as finished e-liquid.
A 120ml e-liquid bottle is suitable for use as a brewing site. You can then pour it into 10ml or 60ml bottles for easy transporting or continue to use the 120ml bottle.
A syringe is essential for getting accurate amounts of each ingredient, and those wishing to use 10ml bottles will benefit from a pipette.
We also recommend you undertake any DIY mixing with the use of gloves.


How to Mix DIY E-liquid?
With everything to hand, all you need to do now is mix the ingredients and give them a few days to brew so that the e-liquid flavour is strong enough to enjoy. It’s a relatively simple process:
- Start mixing VG and PG into a flavourless base mix. We strongly recommend using an e-liquid calculator, which will help break down how much of each ingredient you require by the ml. Remember that the initial PG/VG mix determines how thick and cloudy your final vape liquid will be.
- Add flavour concentrate to the base mix. Be sure to read the product description of the concentrate, as different flavourings suggest different amounts of concentrate be used. Also, remember to be sparing if you intend to combine several different flavour concentrates.
- Add nic shots. Do some liquid maths to determine how much you need to add to attain your desired strength. 1x 18mg nic shot added to 50ml of vape liquid will result in 60ml of 3mg strength liquid, whereas 4x 10ml 18mg nic shots added to 10ml will result in 50ml of 14.4mg strength.
- Put the lid on your mixing bottle and give it all a good, long shake to ensure everything is blending.
- Put the final mixture in a dark, cool place with the lid off for a few days to let steeping take care of the final step. If you’ve used a lot of nic shots we recommend giving it a good while to brew, up to 4-5 days.
And with all that finished, you’ve now got some ready-to-vape DIY e-liquid! It’s an easy process, but if you’d like more detailed step-by-step instructions, check out our how to make vape juice guide.
Need More Help
And there you have it! DIY e-liquid is a vape juice brewed by an enthusiast using a blend of VG/PG base mix, flavour concentrates, nic shots and a little patience. It’s a hands-on way to create your own vape liquid exactly the way you like it, and it’s great fun to boot! Visit the MIST online store to get all the DIY e-liquid products you need to make your own vape juice!