
Spending too much on vape juice? Then why not make your own! We’ve created this ultimate guide to how to make vape juice to show you exactly how to make your own e-liquid in comfort of your own home.
DIY vape juice is, effectively, making your own, bespoke liquid to suit your exact tastes and needs. Making your own allows you to determine the flavour, the nicotine strength and most importantly, how to spread the costs of vaping effectively.
But of course, we appreciate you’d like a more robust breakdown of the exact process and what equipment and ingredients you’ll need to begin this new fun and cost-effective hobby, so read on for our detailed walkthrough!
How to make your own vape juice in 8 steps:
- Gather equipment
- Gather ingredients
- Do your measurements
- Create a base mixture
- Add flavour
- Add nicotine
- Bottle up your vape juice
- Steep your vape juice
Step 1: Gather the equipment needed for DIY vape juice
If you’re confident you have everything you need, skip this next part and go straight to the step-by-step instructions below.
First things first are the tools of the trade. While brewing up your own batch of vape juice is by no means a difficult affair, you are going to need to invest in a small amount of gear and ingredients in order to have a fully functioning homebrew setup.
1. Bottles


Bottles come in a variety of sizes, from 5ml and 10ml bottles, which can be used for measuring and mixing up tester flavours, to 30, 50, and 100ml bottles, which you can use to keep your favourite flavours safe.
2. Measuring containers
Using a container is not necessary for your average DIY vaper; however, if you want to make large batches of vape juice, you might want to invest in some beakers to allow for larger quantities.
3. Syringes / Pipettes
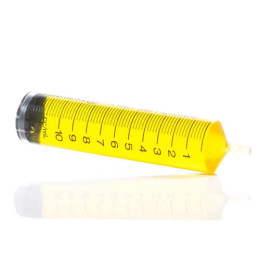
Syringes and pipettes are essential for getting the right quantity of each liquid into your DIY mix. Using these precise tools allows you to extract the exact amount of nicotine, PG, VG, and flavour concentrate needed, making it safe, quick, and easy to transfer to your mixing container.
4. Gloves
Gloves are an invaluable part of the DIY process as they protect your skin from spillages. Nicotine can be absorbed through the skin, so always protect your hands. They are also important for keeping your hands clean as you mix different flavours. Make sure you get a powder-free glove to ensure your mix stays pure and avoid any unwanted contamination.
5. Kitchen roll
Always keep some kitchen roll handy when working with large quantities of vape juice. It’s great for mopping up spillages, wiping clean blunt dripper needles, cleaning up bottle tops, and generally keeping your vape kit dry during your experiments.
With these essentials, you’re well on your way to fully kitting out your own vape juice laboratory. But tools and gear are only the beginning. Now we need to consider the ingredients you’ll be making your homebrew vape juice with.
Step 2: Gather the ingredients you need to make vape juice
Now, the important part: the liquids you’ll be using to create your very own homemade vape juice. Surprisingly, there aren’t that many components to vape juice; you’ll find a detailed list of what you need below.
1. Nic shots
In the event that you’re pursuing pure flavour and are aiming to create a vape juice with 0% nicotine, then feel free to skip this part; for everyone else, this is one of the most important aspects.
There are a number of different styles of nicotine you can utilise, some will be higher in VG and some in PG, and some utilise ‘nicotine salts’ to create a stronger-yet-smoother vape juice.
You’ll likely have to purchase these by the 10ml bottle, as in the UK, it is currently illegal to buy a bottle of nicotine solution any larger than that for personal use. Also, note that 20mg is the legal limit of nicotine strength for products sold in this country.
If you’re importing from overseas, then check the strength and size, as customs may confiscate any contraband, ie, anything over 10ml in size or 20mg in strength.
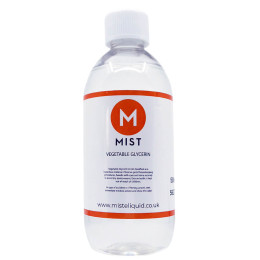
2. PG and VG liquid
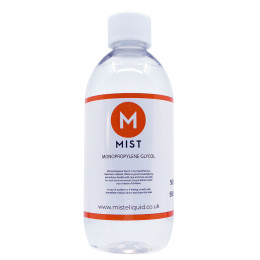
Nicotine aside, these are the most fundamental aspects of any vape juice blend. Propylene Glycol and Vegetable Glycerine, two harmless organic liquids used in a variety of products, both medical and confectionery.
We’ve gone over the specific purposes of both ingredients in another blog, but to quickly clarify, PG is a thinner liquid that conveys flavour well and gives the user a noticeable ‘hit’ in the chest when inhaled. VG is a thicker liquid that produces large clouds and is much smoother to inhale.
Both these liquids can be purchased in large quantities as neither contains nicotine. While it is more common to use a blend of both, some sub-ohm vapers do mix up 100% VG vape juices, so consider this before making a purchase.
We recommend both, however, as even just a small amount of PG will improve your vape juice’s flavour without making it noticeably harsher to inhale.
3. Vape juice flavour concentrates
You’ve got the nicotine and the VG/PG to carry it, now we need to think about flavour. Flavour concentrates are, of course, sold for a number of reasons, most of them not homebrew vaping, so it’s best to source yours from a reputable vape retailer like ourselves.
There is a mind-blowing number of flavour concentrates available, and many can be mixed, paired, and blended to create your desired vape juice flavours. Just use some common sense; blueberry and cherry are likely to work well together. Pipe tobacco and raspberry? Ehh…Need recommendations? I highly suggest reading our best e-liquid flavour concentrates review.
Now, with the equipment and ingredients listed above, you’re ready to get started making your own vape juice.
Step 3: Determine your vape fluid measurements
How much vape fluid are you looking to make today? How strong do you want it to be in terms of nicotine? Are you hoping for a thin PG vape juice or a thicker VG one?
Use our Advanced DIY Vape Juice Calculator to help you out.
Advanced DIY Vape Juice Calculator
Create custom e-liquid recipes with precise calculations for nicotine, PG/VG, flavours, and additives.
Basic Setup
Flavours
Additives
Advanced & Notes
Recipe Output
Flavour Components
Recommended: 5-20%. Exceeding 25% can lead to muting. Varies by flavour.
Additives and Enhancers
Use additives sparingly. Common ones include Sweetener (Sucralose), Menthol, Koolada (WS-23), Sour, etc.
Recommended: 0-5%. High percentages can drastically alter the vape.
?
Nicotine salts provide smoother throat hit at higher concentrations compared to freebase nicotine. Affects perceived throat hit.
?
Calculates a slightly larger batch to compensate for liquid lost clinging to containers/syringes.
Recipe Name
Mix Details
Batch Size: 0ml | Target PG/VG: 0/0 | Target Nic: 0mg/ml
Final PG/VG: 0/0 | Total Flavour: 0%
Created: N/A | Steep Time: 0 days
Ingredients (ml)
Flavours (0ml, 0%)
Notes
No notes added.
Mixing Results (ml)
Nicotine Base: 0 ml
PG Base: 0 ml
VG Base: 0 ml
Flavours Total: 0 ml
Additives Total: 0 ml
Total Mix: 0 ml (0 g)
Final PG/VG Ratio: 0/0
Flavour Breakdown
Disclaimer: This calculator is for informational and educational purposes only. DIY e-liquid mixing involves handling concentrated nicotine, which is toxic. Always use appropriate safety gear (gloves, eye protection), work in a well-ventilated area, and ensure accurate measurements. Keep all nicotine and mixing supplies out of reach of children and pets. The creators of this tool are not responsible for any misuse or accidents resulting from its use. Verify calculations before mixing.
Step 4: Prepare your base mixture
Here we are, laying the foundation stone of what might be the next big vape juice. Time to get those gloves on!
Based on the results of the calculations you just made, use appropriately sized syringes to extract the PG and VG amounts you determined and add them to the beaker you’ll be using for your blend.
Be sure to give each syringe you use a good rinse afterwards to prevent any kind of buildup or future contamination.
Step 5: Add flavour concentrates
Right now, you’ve got a cup of utterly flavourless vape juice. You could vape it right now, though it wouldn’t be overall pleasant. PG is flavourless in its raw state, and VG carries the slightest sugary flavour, but it’s unlikely to be anyone’s favourite.
While vape calculators do take concentrate amounts into account, this is the more experimental aspect of the brewing process; you need to decide for yourself how intense you want the flavour to be.
As a general rule of thumb, having concentrates take up 5% of your vape juice will result in a very subtle flavour, whereas 20% is considered the upper limit by many, resulting in a flavour that’s a little too powerful or sweet for some.
We need to discuss this in terms of ‘percentage’ because, of course, the specific amounts in terms of ‘milliliters’ will change depending on how much vape juice you’re intended to brew.
Not sure what flavour concentrates you should add together? Beginner-friendly vape juice recipes are perfect for you.
Step 6: Add nicotine
Here’s where you want to take a bit of care, as nicotine is, of course, a very powerful substance, and while in the UK at least you’re unlikely to be working with dangerous amounts of it, getting the dosage wrong can result in a vape fluid which is too powerful and overwhelming to use.
For your convenience, use our nicotine shot calculator below:
Nic Shot Calculator
Nicotine Shot ml required:
0.00mlHow many Nic Shots you need:
0Total Finished E-Liquid:
0.00mlRemember, the strength of the nicotine must be judged against how much overall vape juice you’re making; a single 10ml shot of 18mg nicotine solution added to 50mls will result in 60mls at 3mg, but you’d have to add 3 of those shots to 150ml to get 180ml at 3mg.
While this is the only really confusing aspect of making your own vape juice, the calculators available will be very specific about exactly how much nicotine you’ll need.
As previously mentioned, there are different kinds of nic shots available, so consider whether your vape juice in-waiting is PG or VG-centric, or whether you’d prefer the smooth strength of a nic salt.
Something to keep in mind, nic shot is different from a nic salt.
Step 7: Mix it and bottle it
You’ve now got your full concoction in the beaker, it’s time to give it a stir so it all mixes together.
Next, take another fresh syringe and transfer your vape juice mix from the mixing beaker to the bottle or bottles you wish to store it in from here on. If using multiple bottles, then stir well in the beaker to ensure each small bottle has the same consistency.
Once bottled, seal up each container and give them a good, long shake.
Step 8: Wait and steep your DIY vape juice
Congrats, by this point, you’re 90% done! Now comes the easiest yet most frustrating part: waiting.
Your vape juice is technically ready to vape now, but it’s unlikely to be tremendously enjoyable. Vape juice needs to steep so that the flavourings can blossom and intensify across the liquid medium they’ve been spread across.
Put your vape juice in a cool, dark place like a cupboard, and ideally store it with the lids taken off. Allowing your vape juice to breathe will darken it and make the flavour far more powerful. Average steep time is usually around 4-5 days, so hopefully you’ve got something to puff on while you wait.
Again, you can technically use it immediately, but you’ll find the flavour pretty underwhelming until it’s had time to mature in a dark, cool place.
Need More Help?
And that’s the whole process! As you can see once you have all the equipment it’s just basic chemistry and patience standing between you a much bigger realm of potential vape flavours.
Making your own vape juice is also the only legal way to acquire liquid with a higher nicotine content than 20mg in the UK.
If you use our guide to brew up a concoction of your own, then tell us about it in a comment, or if you’ve found this an interesting read but still feel you’d rather purchase pre-made vape juice, we’re sure you’ll find something you love in our online vape juice store.
You can also check our What is DIY vape juice guide and these posts:
- How to Make Your Own CBD Vape Liquid: A DIY Guide
- What Are Vape Coils & How Long Do They Last?
- What is Mouth to Lung Vaping?
- What is Direct to Lung Vaping?
- How Much Nicotine Is In A Cigarette
- PG vs VG vape juice explained
- Why is my Vape Spitting/Crackling? – Fix Explained
- Best Tobacco Vape Juices
- When To Change Your Vape Coils
- How to Prevent A Sore/Burning Throat From Vaping
- How long does vape juice last? When to buy new e-liquid
- How Much Does Vaping Cost
- How To Vape: Ultimate Guide To Vaping Properly